ASPL Installation Guide v 1.00
© 2025 Bassem W. Jamaleddine
ASPL Install for Sharing is only available with ASPL Enterprise.
This document shows how to install ASPL so that two or more users can share ASPL containment for the GG-functions and grouping classes. However, the namedspaces are not being shared, as the workspace directory is specific to each user.
Consider the following two UNIX users: rusty and nancy. rusty who purchased ASPL Enterprise, wants to instal it so that he can share the GG-functions with userid nancy, without sharing his workspace directory.
We will install the product for rusty as the primary owner of the distribution: rusty installation is called SHARED MASTER installation. We will install ASPL for rusty in a shared directory. The users nancy will install the product as a secondary owner of the distribution: her installation is called SHARED SLAVE installation.
This chapter details rusty installation. It consists of ten figures detailing the installation procedure for the user rusty as the SHARED MASTER installer. The next chapter details nancy installation, see SECTION 5.2.1 [How-to Install ASPL for Sharing: Adding Users] .
rusty is a UNIX user whose userid is rusty, and group gid is rusty. Since rusty cannot create directory in /opt, then he asked the root system user to create the directory /opt/rusty where he will install ASPL for sharing.
The root user will create the shared directory
# mkdir /opt/rusty
# chown rusty /opt/rusty
# chgrp rusty /opt/rusty
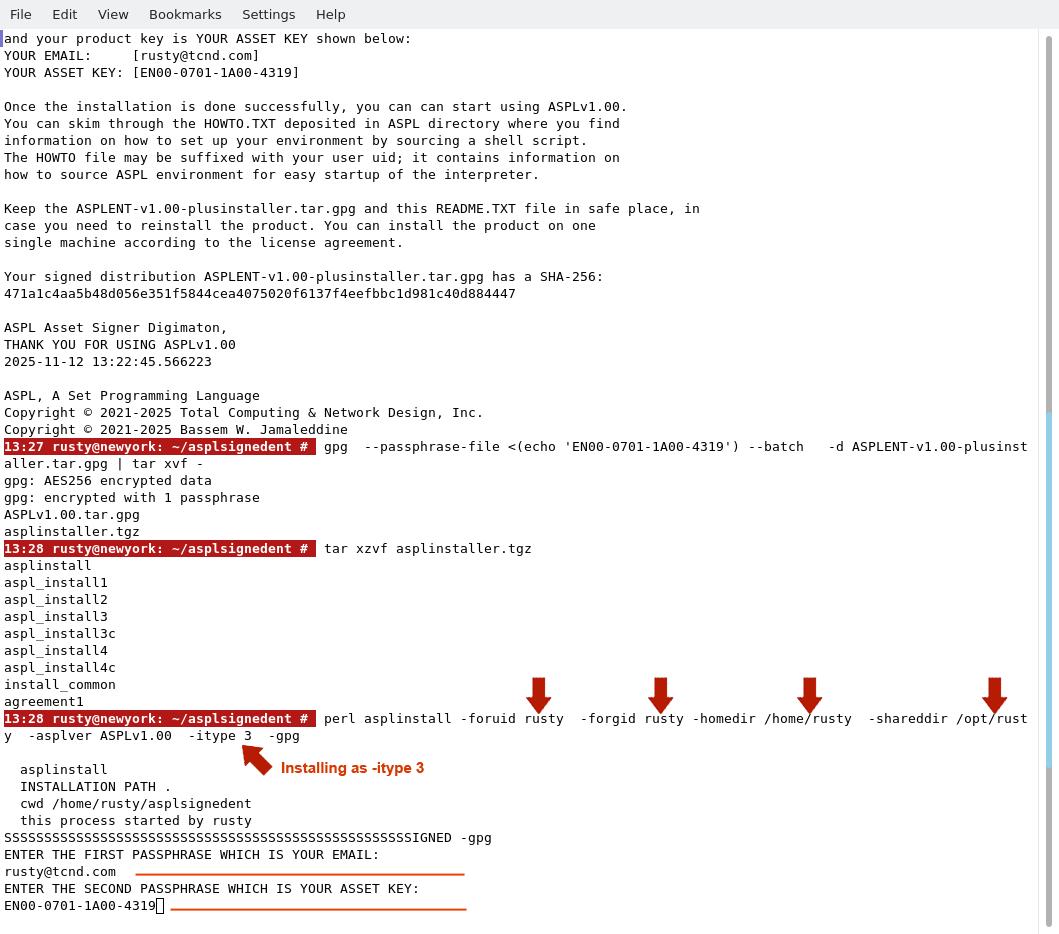
# perl asplinstall -foruid rusty -forgid rusty -homedir /home/rusty -shareddir /opt/rusty -asplver ASPLv1.00 -itype 3 -gpg
■ Install ASPL Enterprise as a SHARED MASTER for rusty
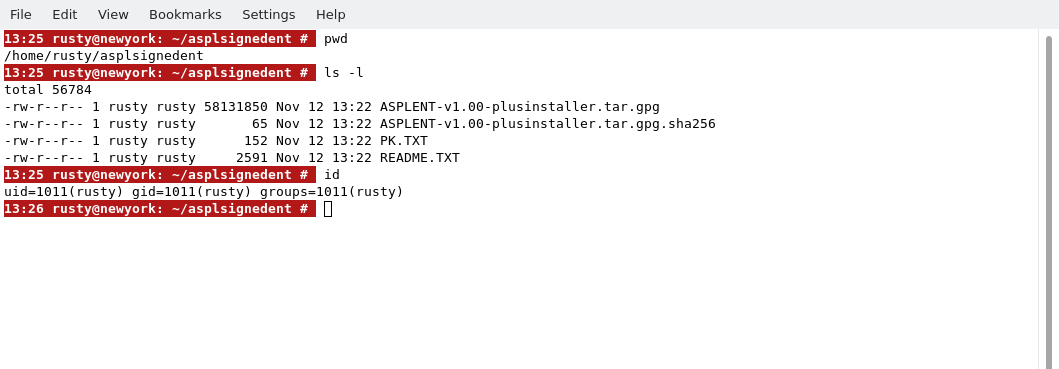
First, rusty needs to copy the signed distribution file along the README.TXT to a temporary directory. The following figure shows the user rusty who copied the distribution into his UNIX home directory in ~/asplsignedent.
Display the content of the README.TXT file as shown in the following figure. This file contains three essential commands to fully install ASPL: the first two commands extract the product distribution, and the third install it. The third command, executing the installer, is replaced where rusty will pass different options. This will be explained in figure 4.1.4.
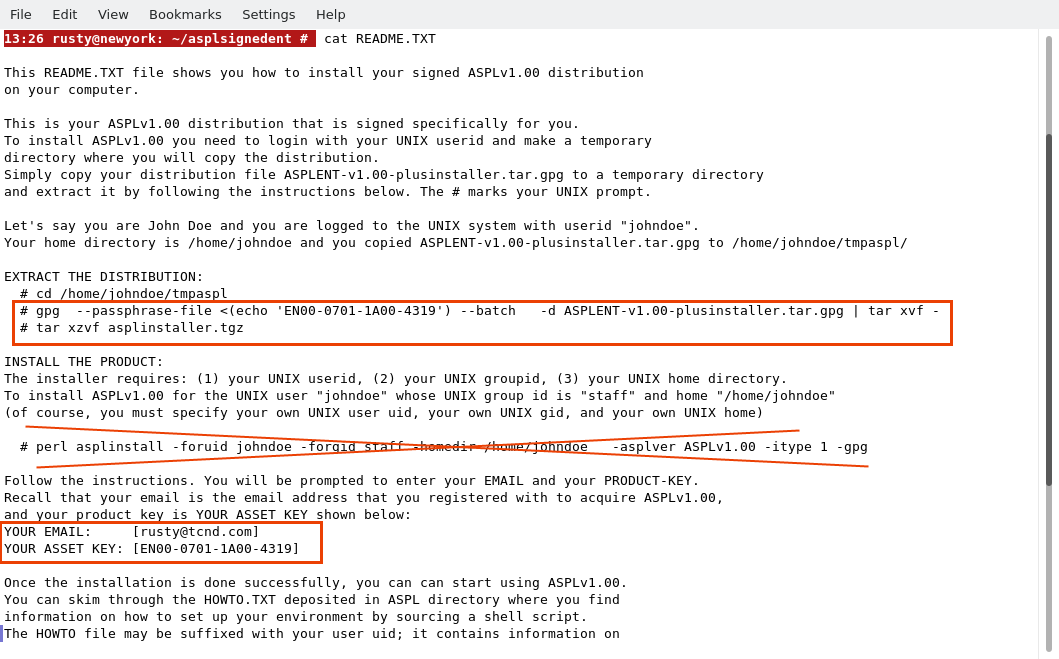
Copy and paste the gpg command along its options, as shown in the following figure. Each user has a different README.TXT file, so you need to copy the command from your own README.TXT that you downloaded along your signed distribution.
Extract the asplinstaller.
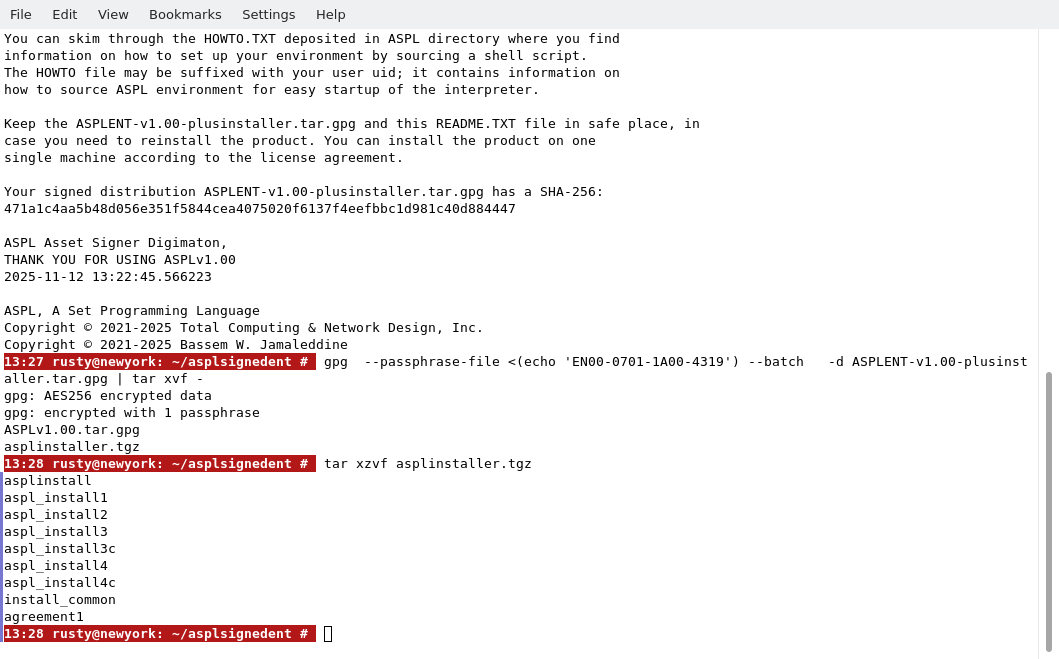
The README.TXT shows the installation for a standalone (option -itype 1), so we will ignore this command; since we need to install ASPL for rusty as a MASTER SHARED installer (option -itype 3), we will issue the following command:
# perl asplinstall -foruid rusty -forgid rusty -homedir /home/rusty -shareddir /opt/rusty -asplver ASPLv1.00 -itype 3 -gpg
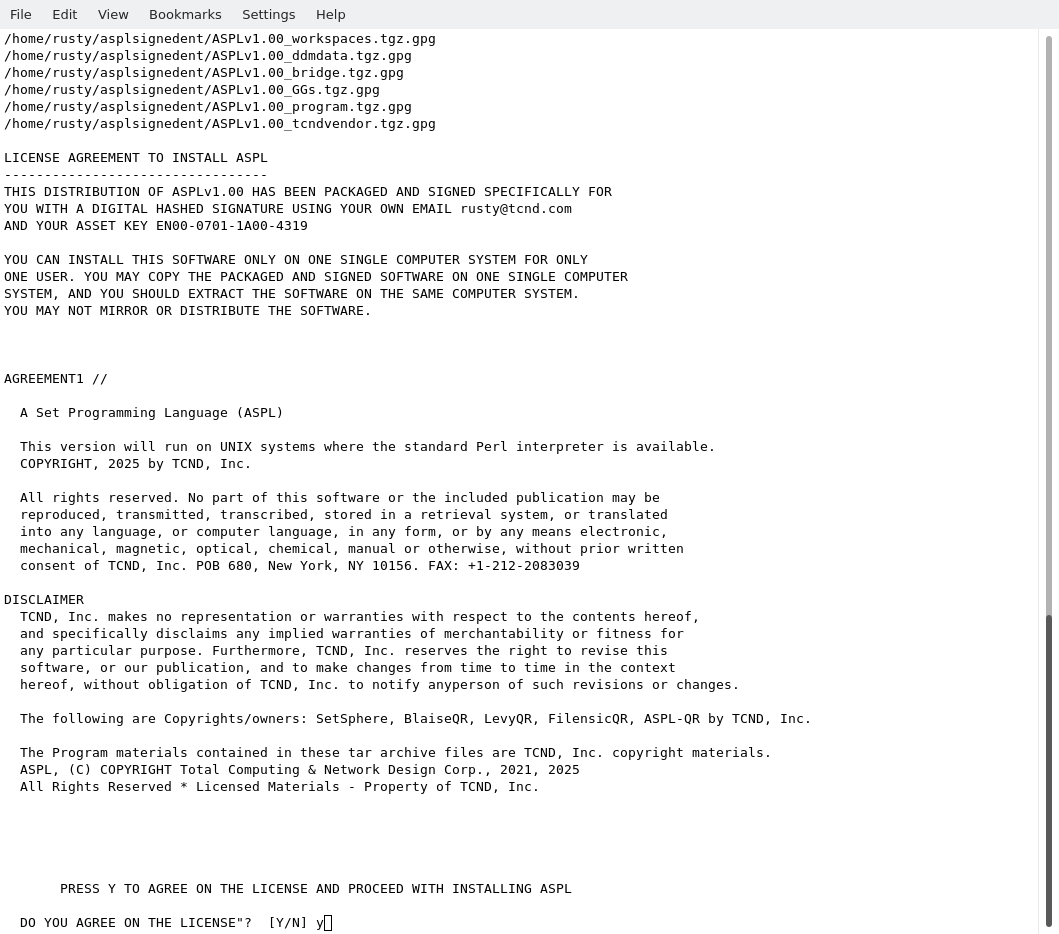
The README.TXT file shows two entries: the first is shown on the line starting with "YOUR EMAIL", and the second is shown on the line starting with "YOUR ASSET KEY". The email and the asset key are required to install your software. For this installation example, we will proceed by entering the email shown in the README.TXT (as shown in the following figure).
rusty entered the binding email and the asset key.
After entering the binding email and the asset key, rusty is prompted to accept the disclaimer.
The software is automatically installed as show in the following figure.
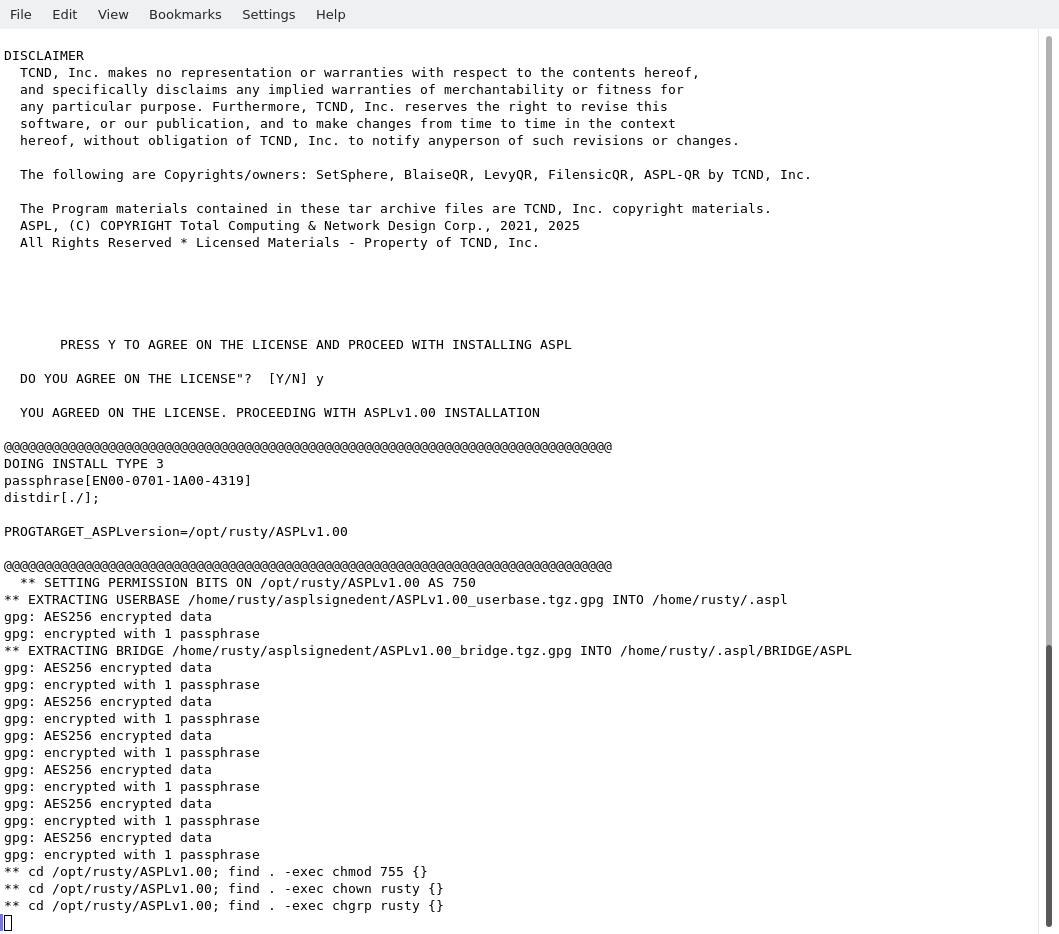
Once the software is installed, the following figure shows the final output of the completed installation. Pay special attention to the output of the screen, you may need to cut and paste it in your note files. Also, the same output is written to the file HOWTO suffixed with the user name, in this particular case it is in /home/rusty/.aspl/HOWTO-rusty.TXT. For anyone running the installer, this file will be suffixed with the user's name. In this file, locate the line containing the setaspl command, this will display the command to source the environment for the ASPL interpreter.

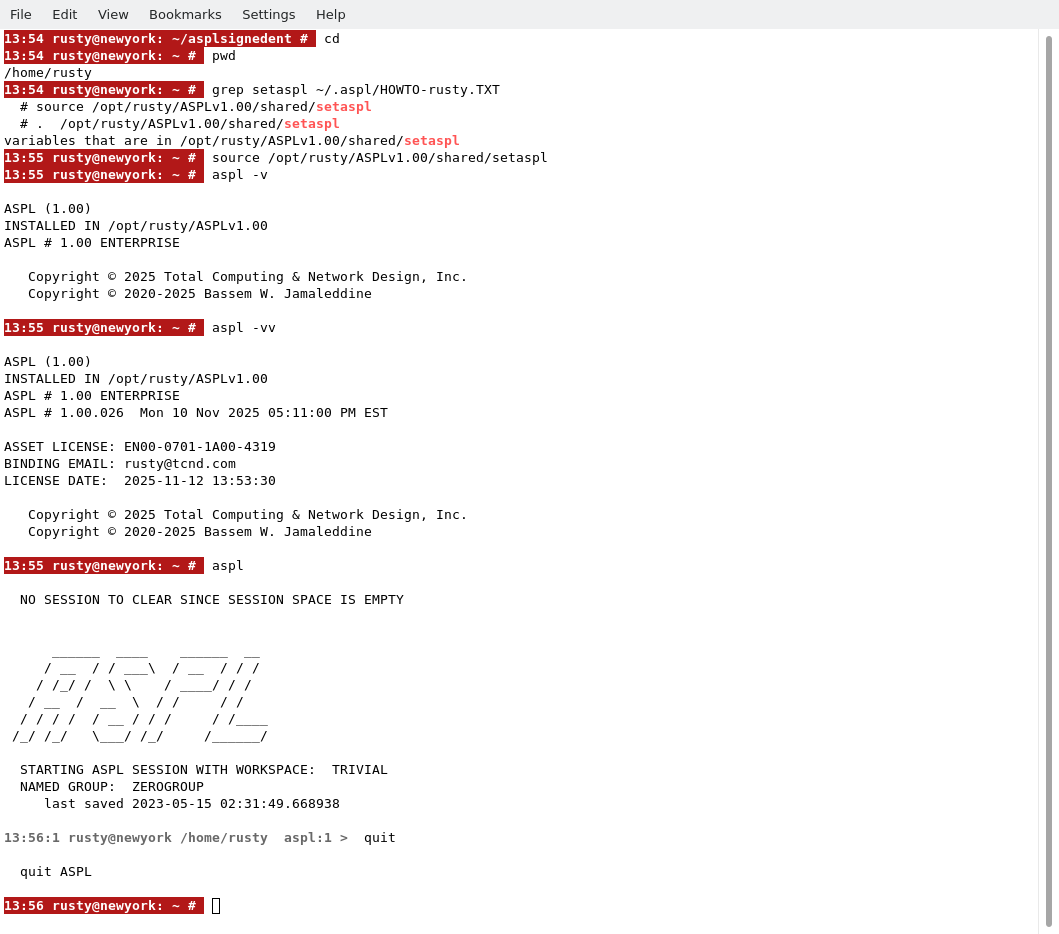
Now the installation is complete. The user rusty can test the installation. We first locate the command that we need to source the ASPL environment into the current bash session (grep for setaspl in the HOWTO). rusty sourced the environment, then start ASPL.
rusty can display the version of ASPL by entering
# aspl -v
# aspl -vv
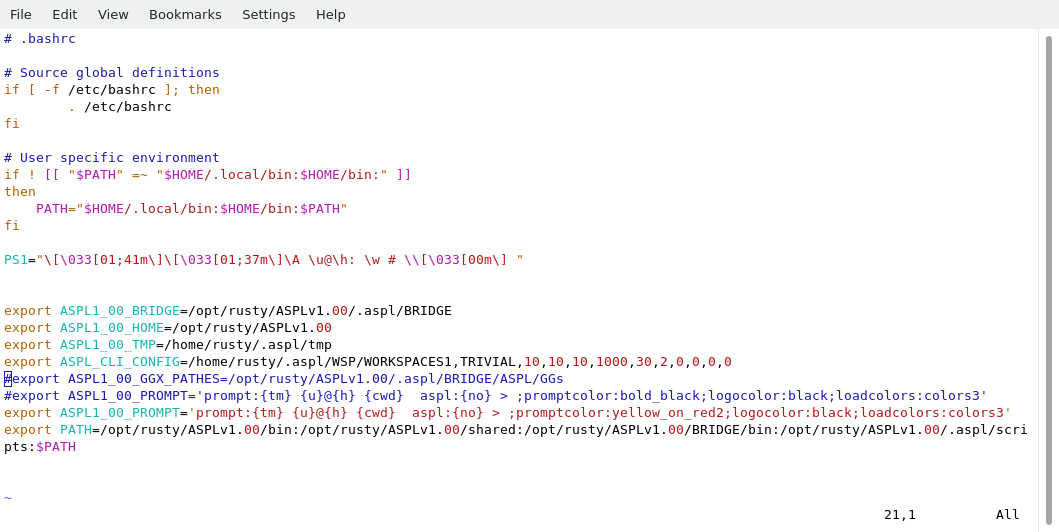
As we login as rusty, let's update .bashrc to include the ASPL environment variables, so they will be available in every session when we ssh to rusty@newyork. We simply edit /home/rusty/.bashrc file and add setaspl script content as shown in the following figure. In the export ASPL1_00_PROMPT we changed the color of the promptcolor to lightred so that we can distinguish rusty ASPL prompt (from nancy's).
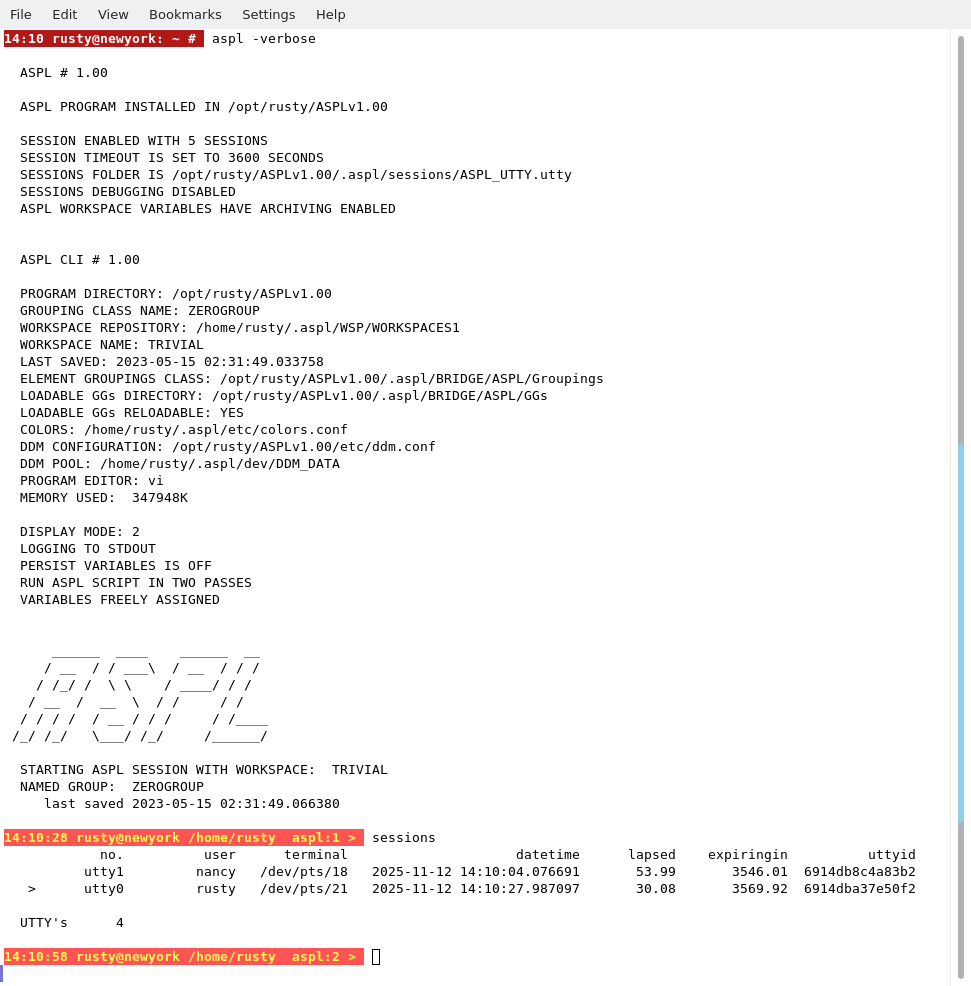
Now we logout rusty, then login again as rusty, and start ASPL. The following figure shows rusty's ASPL started at the shell prompt. We issue the ASPL command
aspl> sessions
In the following chapter. we will install SHARED SLAVE user for the UNIX userid nancy. The userid nancy will be using rusty's ASPL shared directory /opt/rusty/ASPLv1.00.
THIS COMPLETE THE INSTALLATION OF SHARED MASTER
■ How to Remove ASPL for rusty
Removing ASPLv1.00 is simply done with the following commands. For example, userid rusty logins to the UNIX system and issues the following commands to remove ASPLv1.00
# su - rusty
# rm -rf ~/.aspl
# rm -rf /opt/rusty/ASPLv1.00