ASPL Installation Guide v 1.00
© 2025 Bassem W. Jamaleddine
ASPL is a licensed software. Once you have purchased a license, you can proceed installing the product as shown in this document.
The installation consists of only few commands: copying the distribution to a temporary directory, extracting the distribution, and running the installer. This document consists of fourteen figures detailing ASPL installation procedure.
The following installation is termed ASPL install with itype 1 to refer to a single-user installation of the ASPL distribution. It can be applied to any of ASPL distributions: ASPL Standard, ASPL Professional, or ASPL Enterprise.
■ How to Install ASPL as Single User
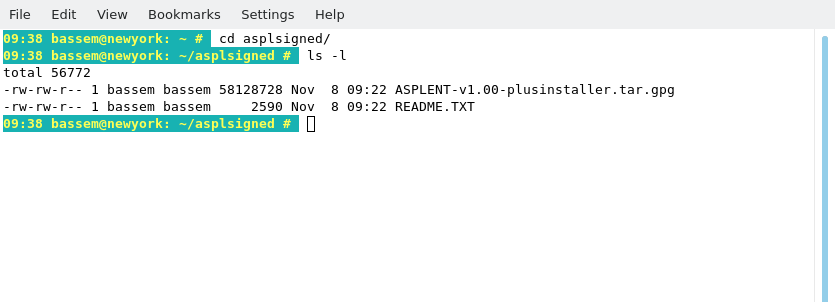
Copy the signed distribution file along the README.TXT to a directory. The following figure shows the user bassem who copied the distribution into his UNIX home directory in ~/asplsigned.
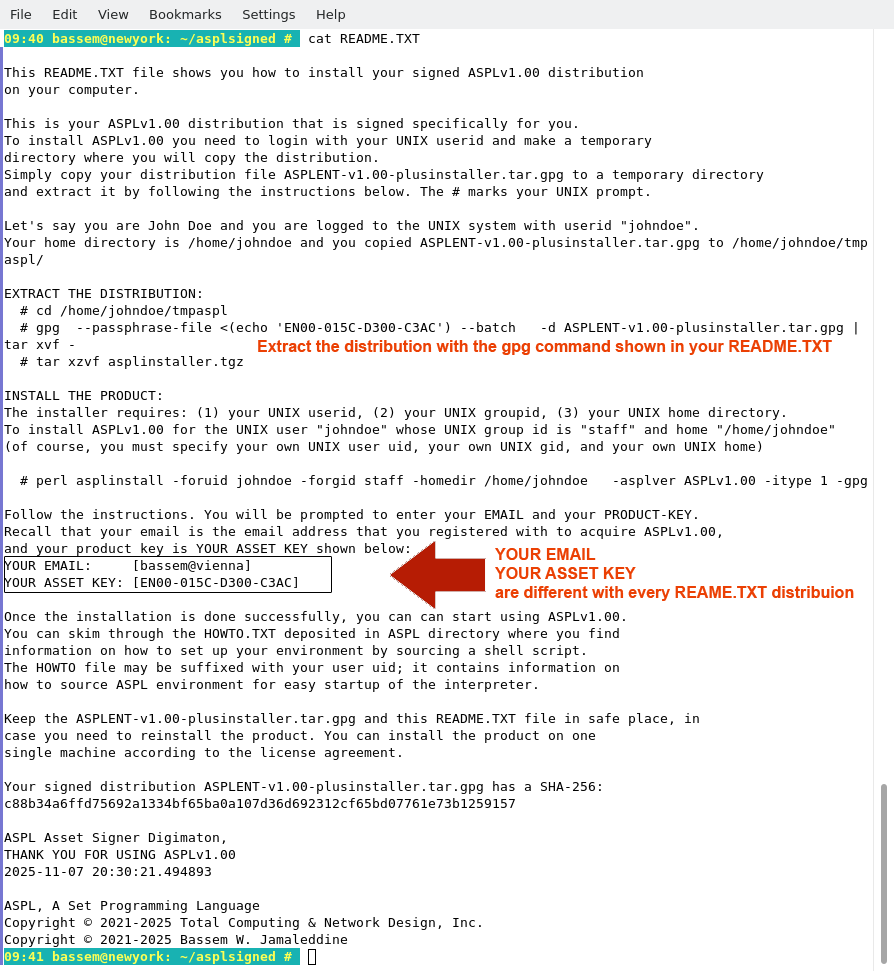
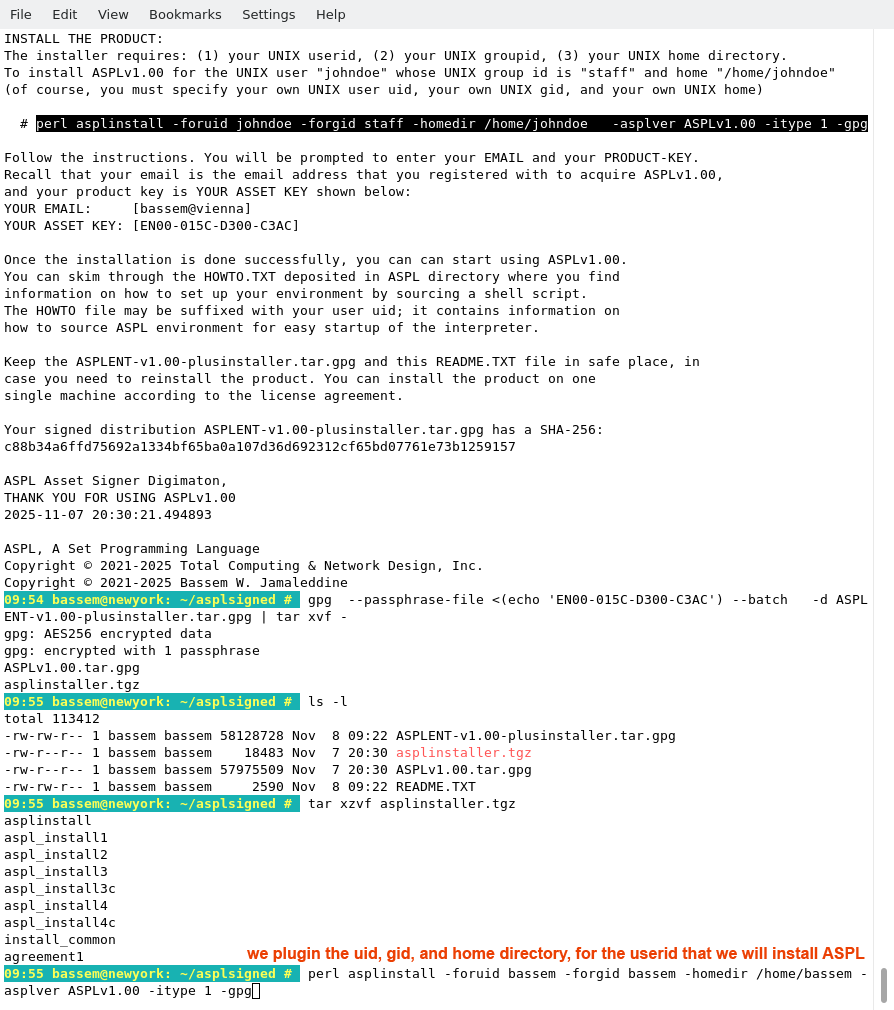
Display the content of the README.TXT file as shown in the following figure. This file contains three essential commands to fully install ASPL: the first two commands extract the product distribution, and the third install it.
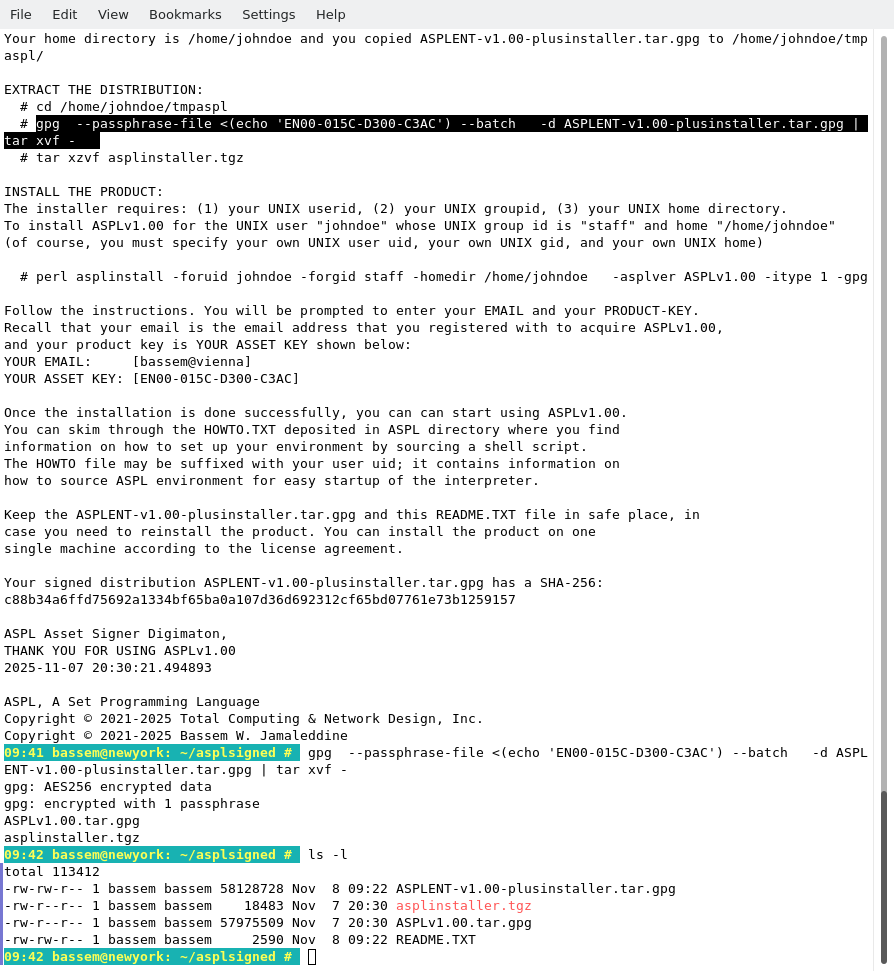
Copy the command gpg as shown in the following figure, then paste it at your shell prompt. Of course, you can type it as it is.
Each user has a different README.TXT file, so you need to copy the command
from your own README.TXT that you downloaded along your signed distribution.
from your own README.TXT that you downloaded along your signed distribution.
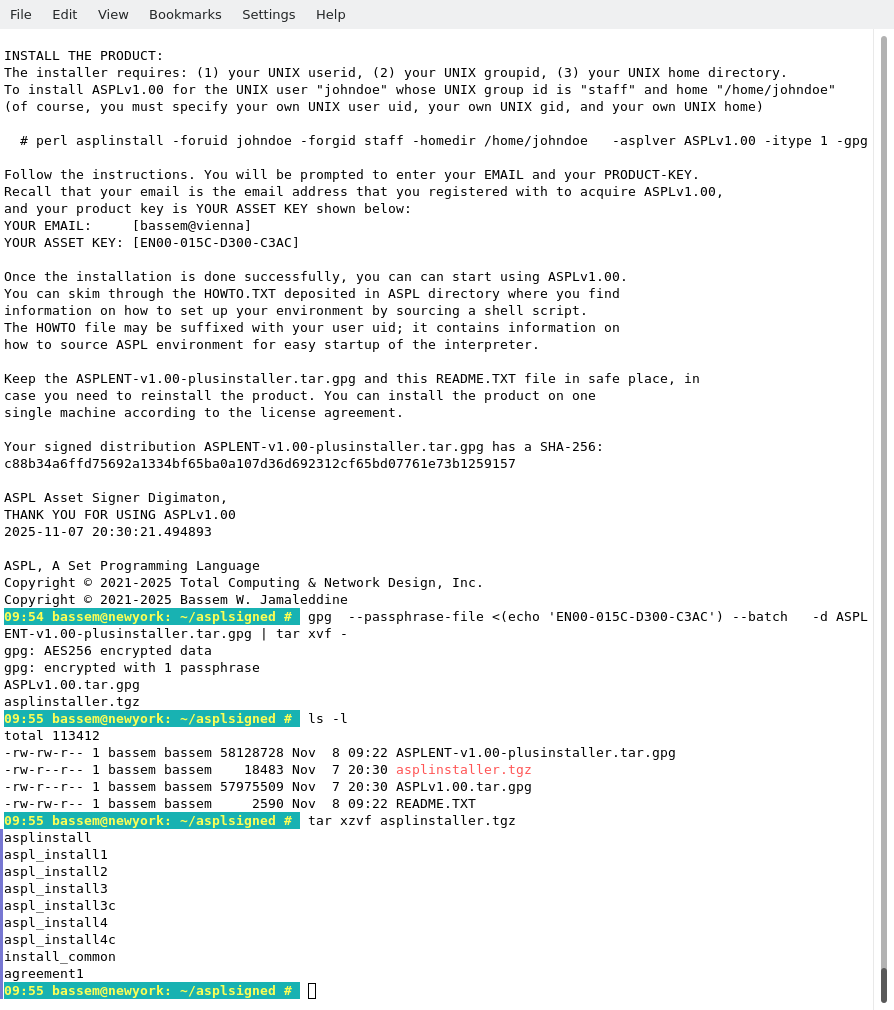
Extract the asplinstaller as shown in the following figure
# tar xzvf asplinstaller.tgz
Copy the installation command that is issued for John Doe, however, you must use your own UNIX userid, gid, and home directory. In the following figure we show the command to install the product for the userid bassem whose gid is bassem, and his home directory is /home/bassem.
# perl asplinstall -foruid bassem -forgid bassem -homedir /home/bassem -asplver ASPLv1.00 -itype 1 -gpg
The README.TXT file shows two license binding entries: the first is shown on the line starting with "YOUR EMAIL", and the second is shown on the line starting with "YOUR ASSET KEY". The email and the asset key are required to install your software. For this installation example, we will proceed by entering the email shown in the README.TXT (as shown in the following figure).
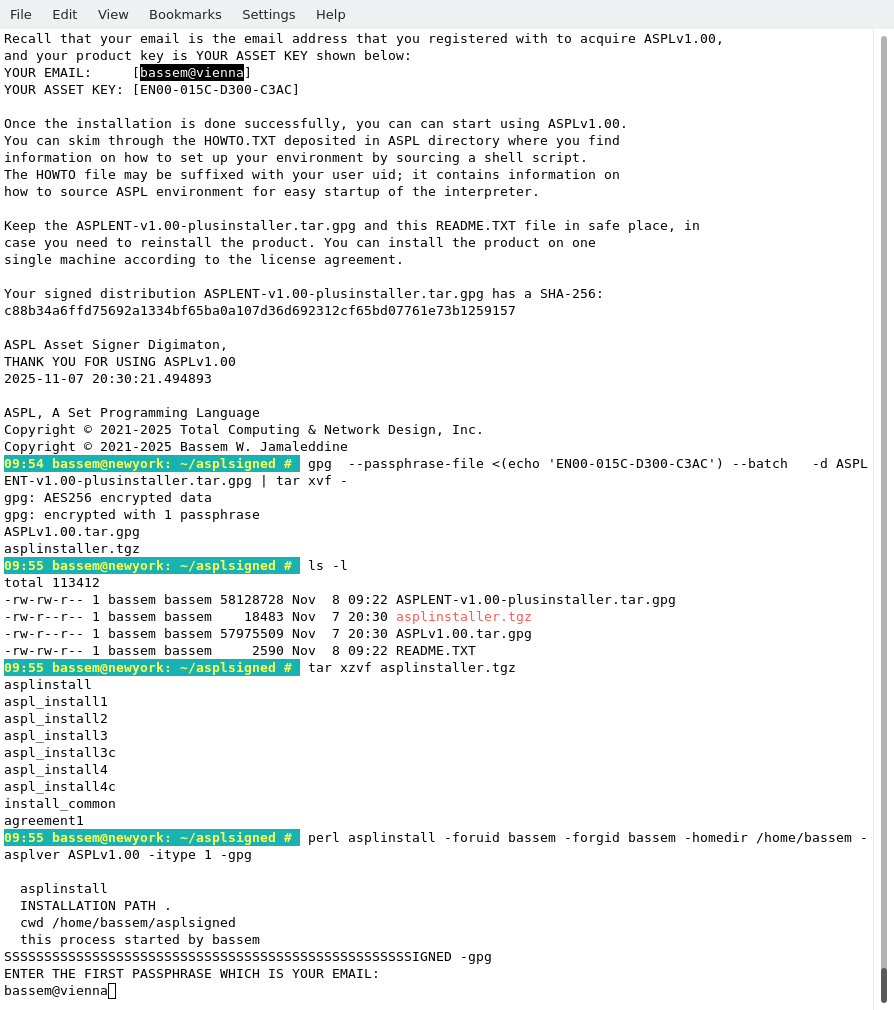
Next, we need to enter the asset key, as shown in the following figure.

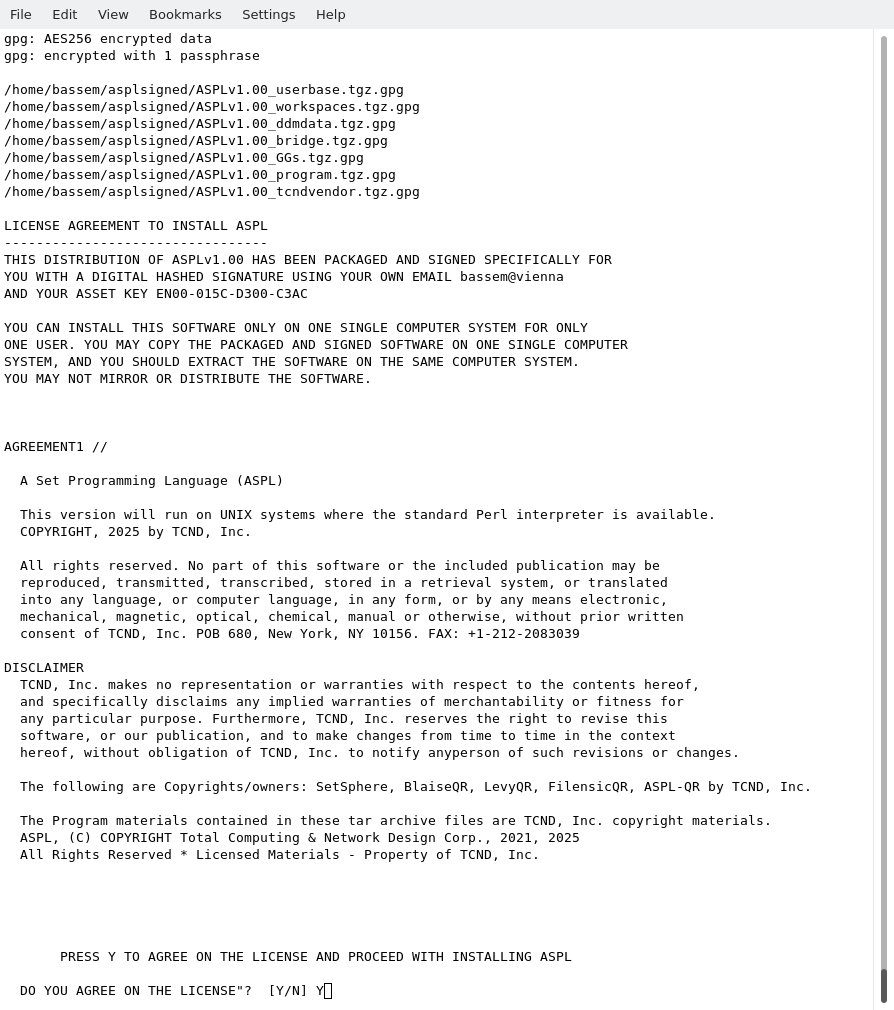
To proceed with installation, we accept the disclaimer and answer Y, as shown in the following figure.
The software is automatically installed as show in the following figure.
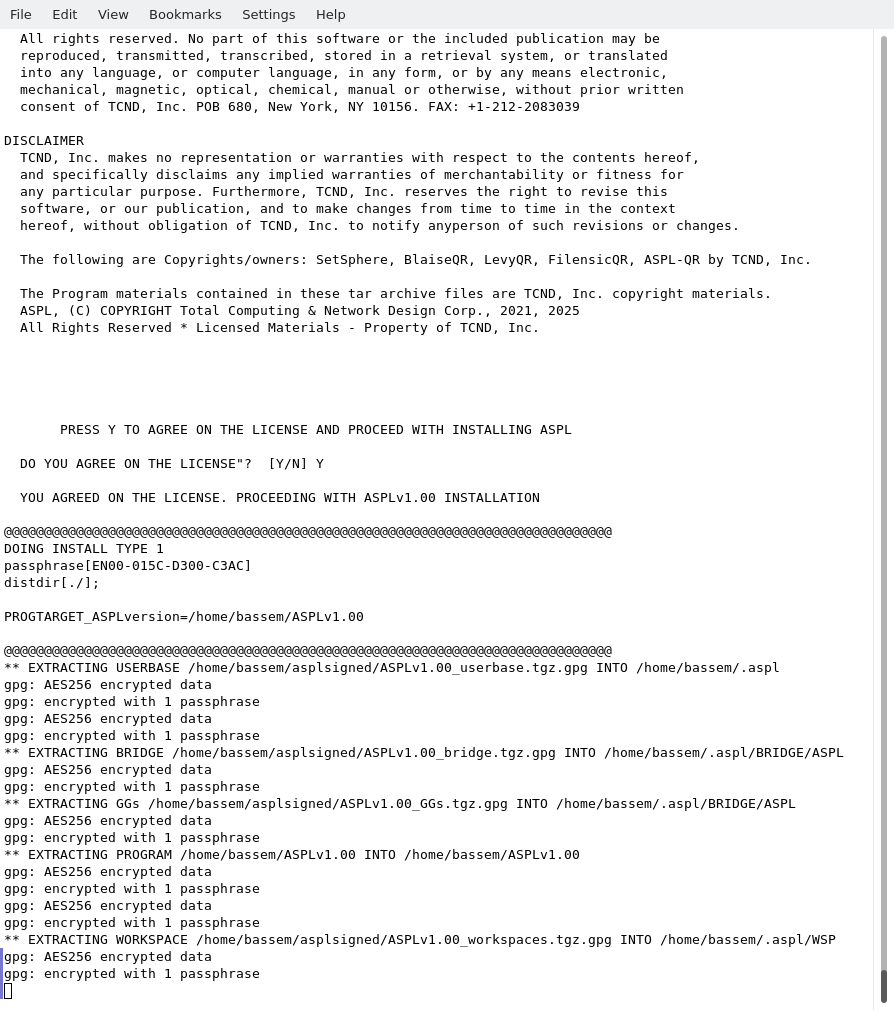
The following figure shows the final output of the installer after completing the installation.
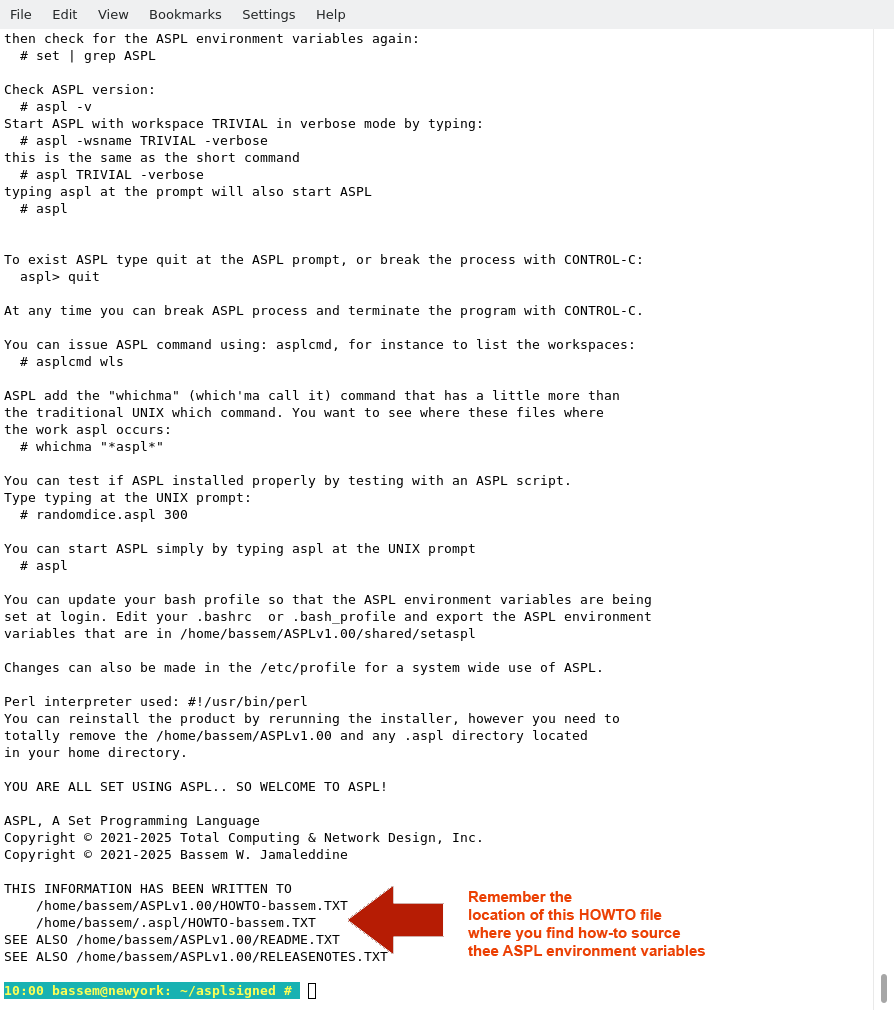
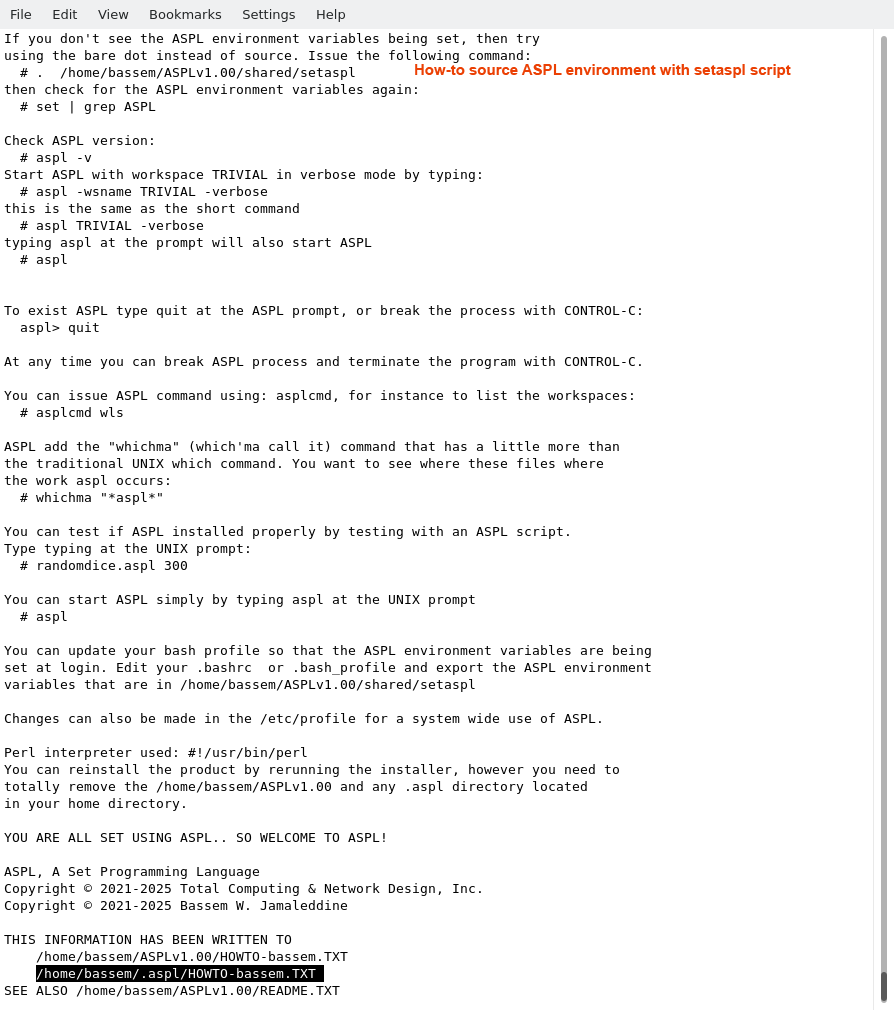
When you run the installer, pay special attention to the output written on the screen, where you will find valuable information on how to source ASPL environment, and test your installation. The same output is written to the file HOWTO suffixed with the user name, in this particular case it is in /home/bassem/.aspl/HOWTO-bassem.TXT. For anyone running the installer, this file will be suffixed with the user's name. In this file, locate the line containing the source command (or its equivalent dot command); you need this command to source the environment and start using ASPL. The simplest way to locate the source command:
# grep setaspl ~/.aspl/HOWTO-bassem.TXT
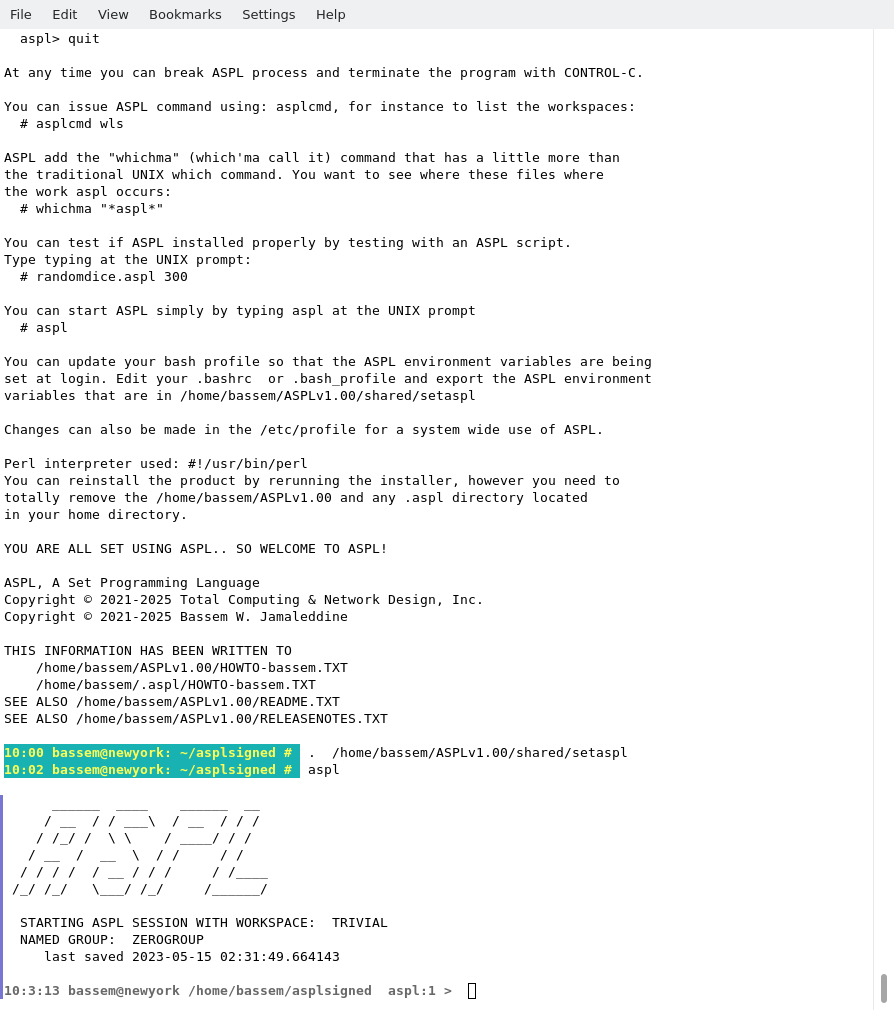
The following figure shows how we sourced the bash environment and start using ASPL:
# . /home/bassem/ASPLv1.00/shared/setaspl
# aspl
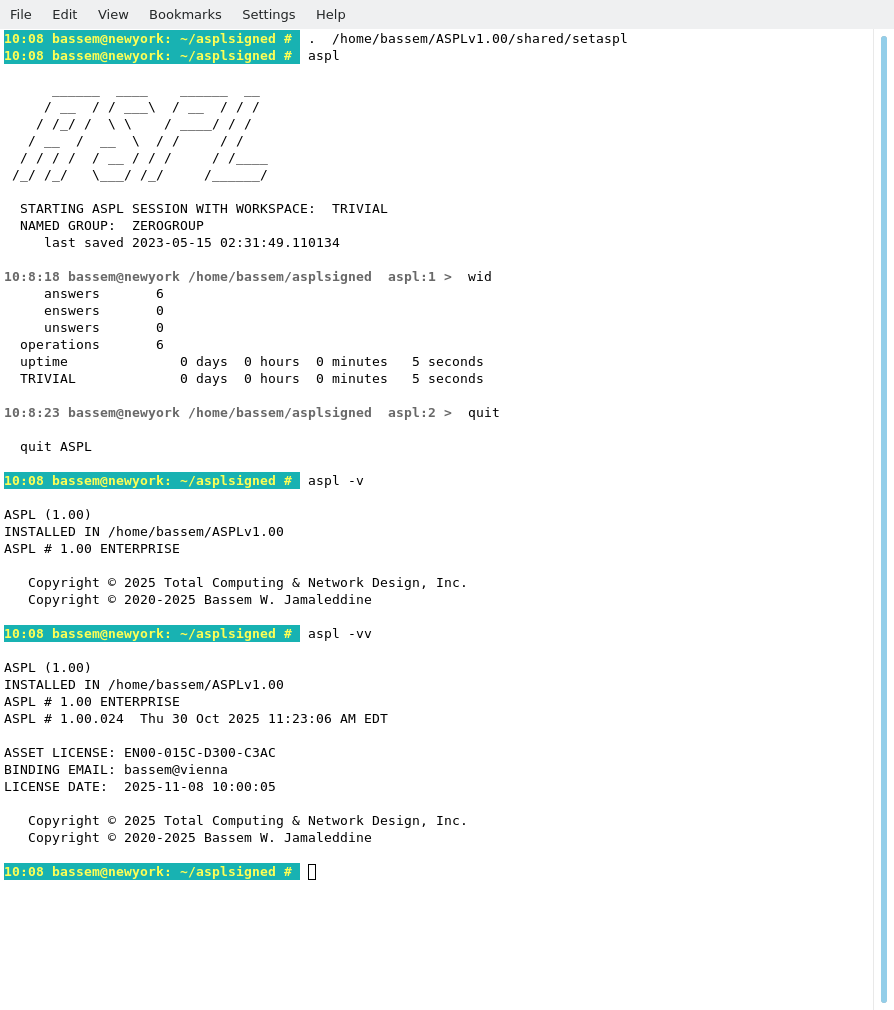
You can display the version of ASPL by entering
# aspl -v
# aspl -vv
To have ASPL run seemlessly every time you login to your account, copy the content of setaspl to your shell profile (eg. your .bashrc), so that every time you login to your account, the ASPL environment variables are being sourced in your shell environment.
Ask your system administrator on how to make changes to your shell profile.
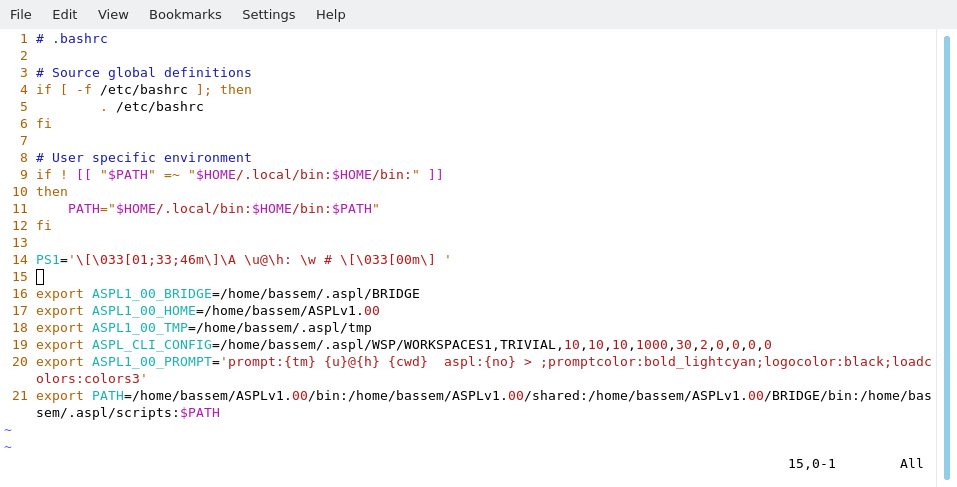
The following figure shows how userid bassem copied /home/bassem/ASPLv1.00/shared/setaspl to his .bashrc profile.
THIS COMPLETE THE SINGLE-USER INSTALLATION
■ How to Remove ASPL
Removing ASPLv1.00 is simply done with two commands. For example, userid bassem logins to the UNIX system and issues the following commands to remove ASPLv1.00
# su - bassem
# rm -rf ~/.aspl
# rm -rf ~/ASPLv1.00