ASPL Installation Guide v 1.00
© 2025 Bassem W. Jamaleddine
Users using the ASPL calculator can share the same namedspace and do set operations on the objects defined in that namespace. This capability is only available in ASPL Entreprise where sessions management can be enabled.
This document shows how to install ASPL so that two or more users can share the objects saved to their workspaces.
Consider the following three UNIX: euler, moran, and pascal.
The general strategy of the install is to have euler install the product as the primary owner of the distribution: euler installation is called COLLABORATIVE MASTER installation. euler will have the ASPL installation in a shared directory. The users, moran and pascal, will install ASPL as a secondary owners of the distribution: their installation is called COLLOBARATIVE SLAVE installation.
The next section consists of eight figures detailing the installation procedure for the user euler as a COLLABORATIVE MASTER owner. The following subchapters detail the installation of two users: moran and pascal, as COLLOBARATIVE SLAVE installer to share euler ASPL installation.
Create the userid euler
# adduser euler
# mkdir /opt/euler
# chown euler /opt/euler
# chgrp euler /opt/euler
# su - euler
# mkdir /home/euler/aspldisgnedent
# cd /home/euler/aspldisgnedent
In this subchapter, we install ASPL for euler as a COLLABORATIVE MASTER installation. In the next subchapters, we show how to add two users: moran and pascal, as COLLOBARATIVE SLAVE installers so they can collaboratly share euler namedspaces.
For each user, the installation consists of one asplinstall command (and should not take more than few seconds); however, we present many screen captures to show the installation in details.
■ Install ASPL Enterprise as a COLLABORATIVE MASTER for euler
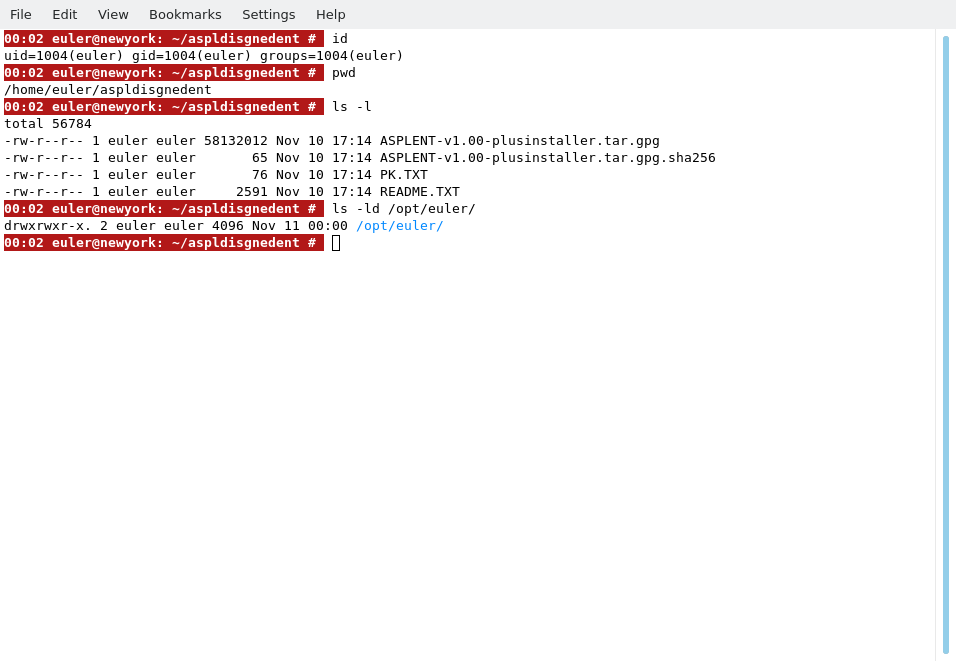
Copy the signed distribution file along the README.TXT to a directory. The following figure shows the user euler who copied the distribution into his UNIX home directory in ~/aspldisgnedent.
Display the content of the README.TXT file as shown in the following figure. This file contains three essential commands to fully install ASPL: the first two commands extract the product distribution, and the third install it. However, the third command (perl asplinstall ...) is for a standalone user installation and will be replaced with another command (shown in the next figure).
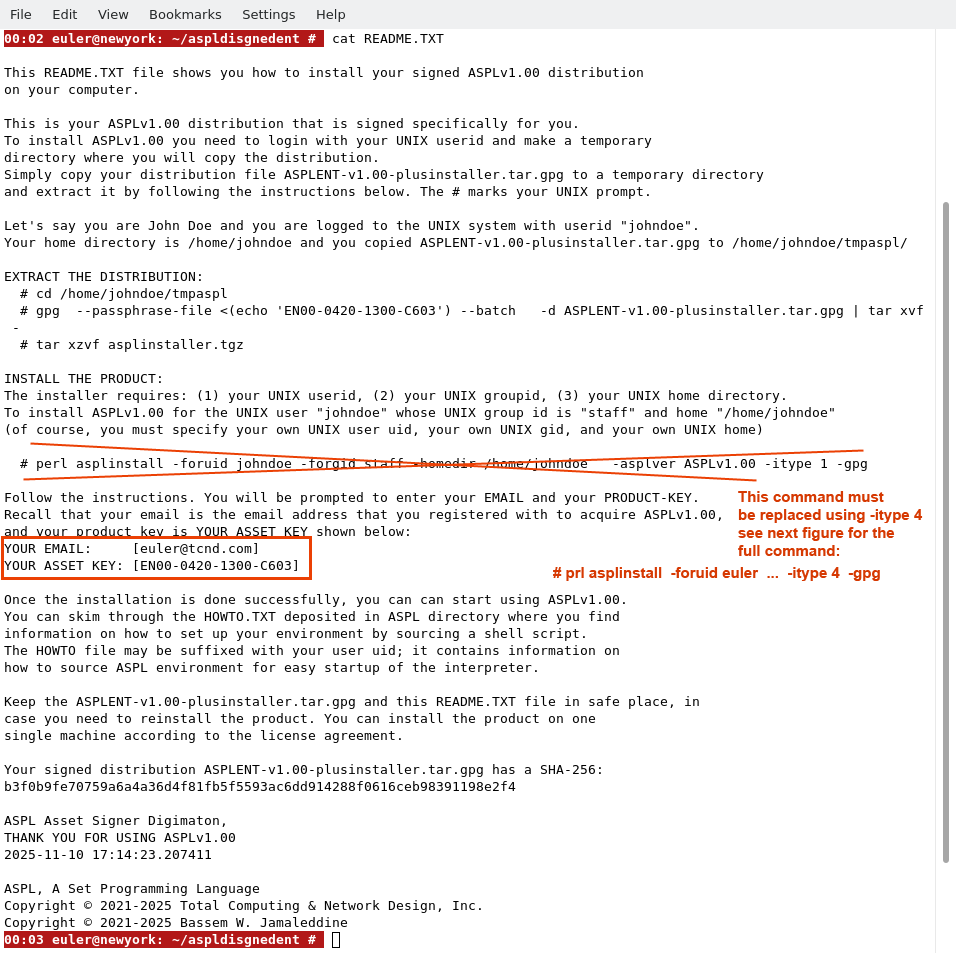
In the following figure, euler copied and pasted the command gpg and its options (as they are), as shown in the following figure. Each user has a different README.TXT file, so you need to copy the command from your own README.TXT that you downloaded along your signed distribution.
The tar command deflated the asplinstaller.
The README.TXT shows the installation for a standalone (option -itype 1), so euler ignored this command, and replaced it with the appropriate command to install ASPL as a COLLABORATIVE MASTER installer (-itype 4). euler issued the following command:
# perl asplinstall -foruid euler -forgid euler -homedir /home/euler -shareddir /opt/euler -asplver ASPLv1.00 -itype 4 -gpg
The -shareddir is followed by the directory we created earlier, it will hold the ASPLv1.00 that will be shared by other users who will install ASPL as COLLABORATIVE SLAVE, as we will see in the next subchapter.
The README.TXT file shows two entries: the first is shown on the line starting with "YOUR EMAIL", and the second is shown on the line starting with "YOUR ASSET KEY". The email and the asset key are required to install your software. For this installation example, euler proceeded by entering the email and asset key.
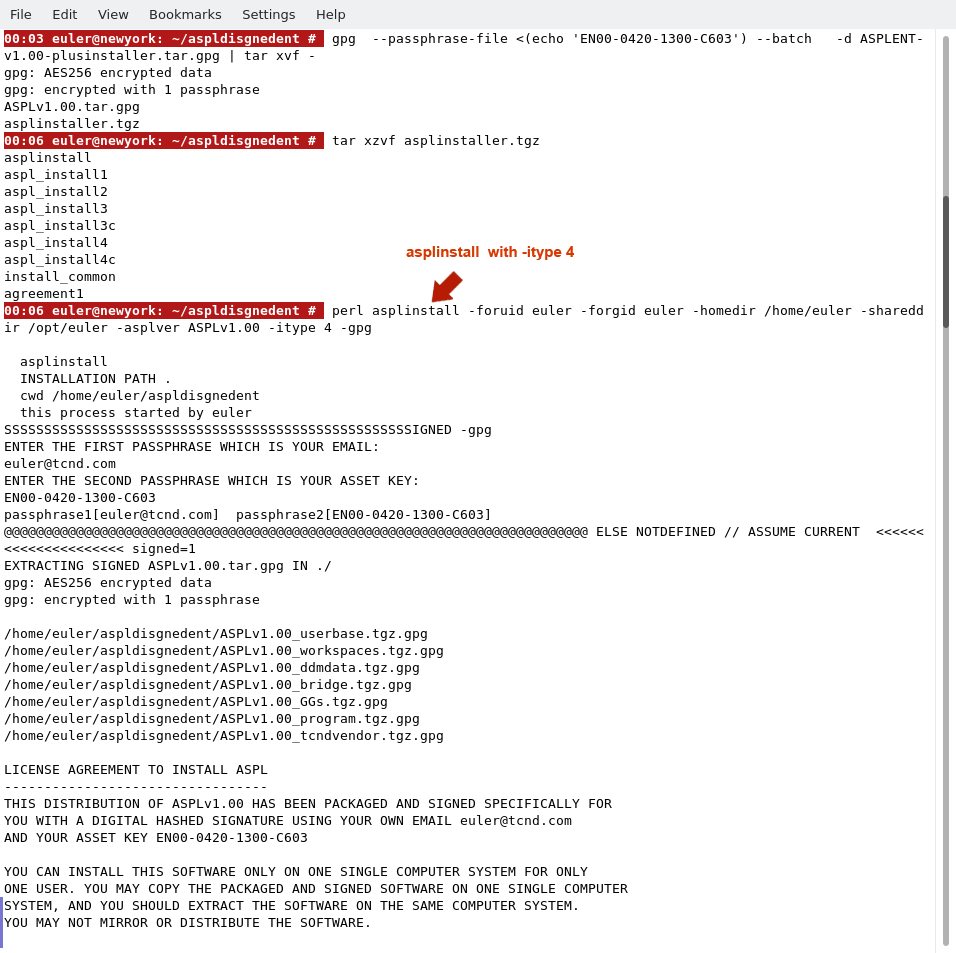
The software is automatically installed as show in the following figure. When you run the installer, pay special attention to the output written on the screen, where you will find valuable information on how to source ASPL environment, and test your installation. The same output is written to the file HOWTO suffixed with the user name, in this particular case it is in /home/euler/.aspl/HOWTO-euler.TXT. For anyone running the installer, this file will be suffixed with the user's name. In this file, locate the line containing the setaspl command, this will display the command to source the environment and start using ASPL.
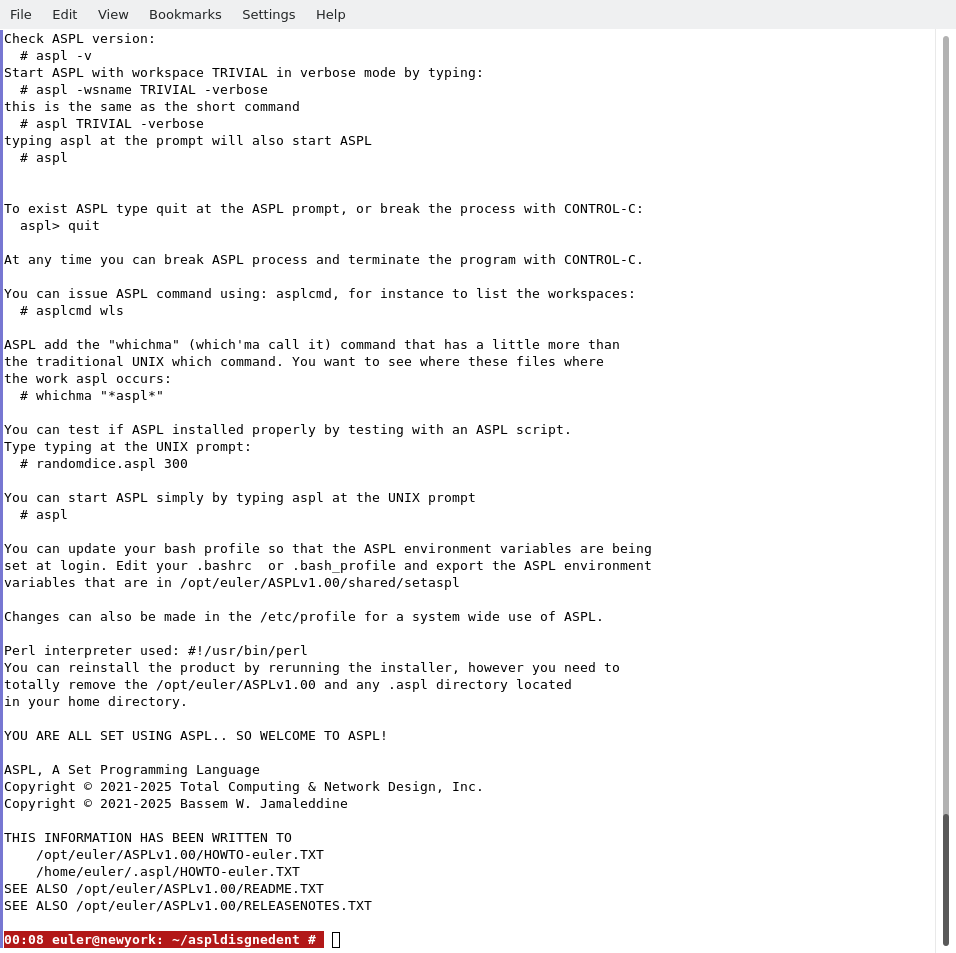
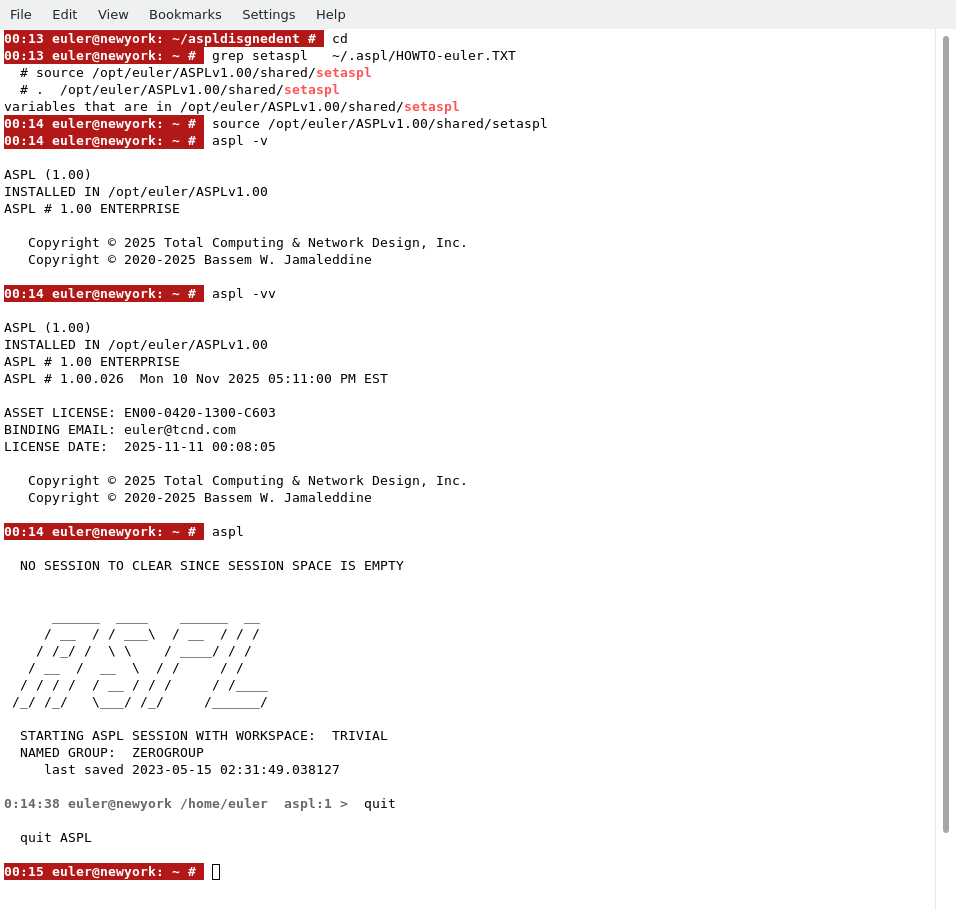
Now the installation is complete. The user euler can test the installation. We first locate the command that we need to source the ASPL environment into the current bash session (grep for setaspl in the HOWTO). We source the environment, then start ASPL.
You can display the version of ASPL by entering
# aspl -v
# aspl -vv
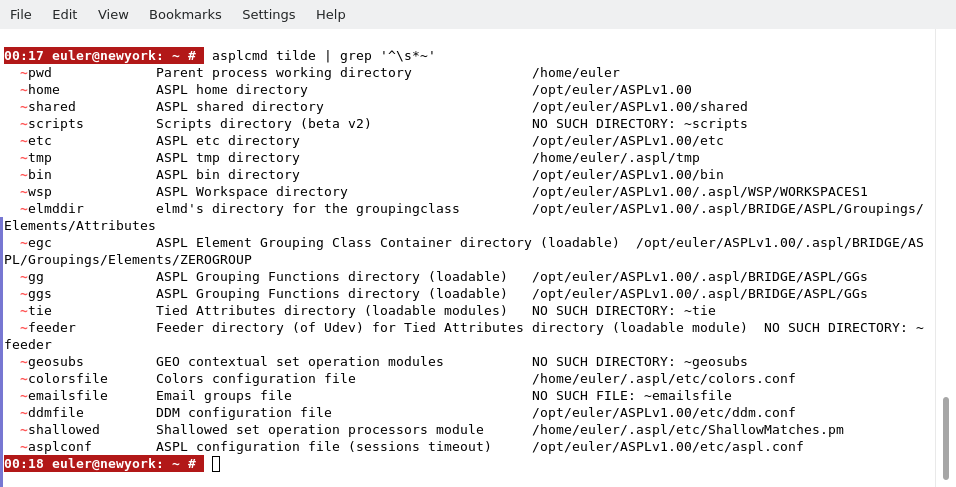
Let's look further about where ~tmp ~ggs and ... container is being defined ...
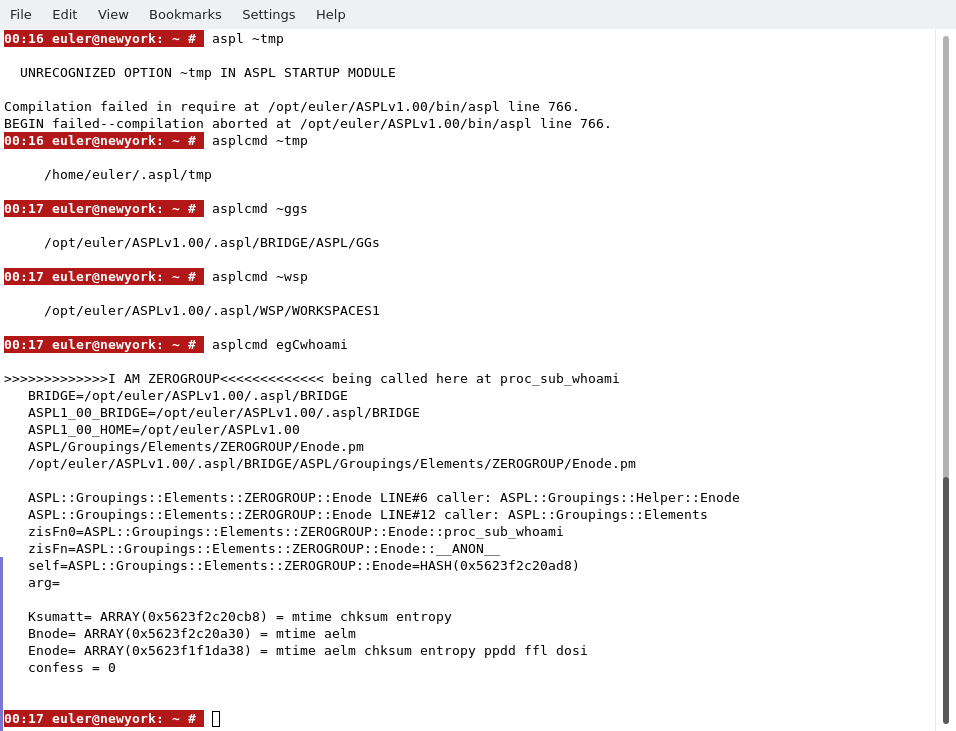
The tilde command can reveal the location of the ~tmp, ..
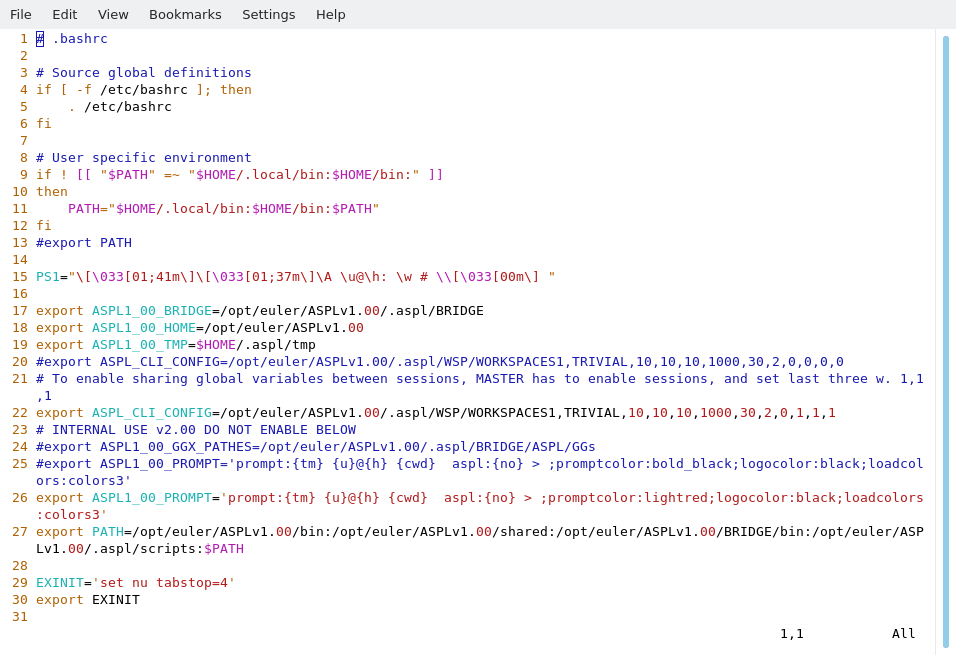
We will edit ~/.bashrc to include the ASPL environment variables, so they will be available in every session when we ssh to euler@newyork. We simply edit the file ~/.bashrc and add the content of setaspl script as shown in the following figure. In the export ASPL1_00_PROMPT we changed the color of the promptcolor to lightred so that we can distinguish euler ASPL prompt from the others.
Now we logout from euler, then login again as euler, and start ASPL, to make sure the changes too effect.
In the following subchapter, we install ASPL for two UNIX users: moran and pascal, as COLLOBARATIVE SLAVE users. Both of these users will be using euler's ASPL shared directory /opt/euler/ASPLv1.00.
THIS COMPLETE THE INSTALLATION OF COLLABORATIVE MASTER
■ How to Remove ASPL for euler
Removing ASPLv1.00 is simply done with the following commands. For example, userid euler logins to the UNIX system and issues the following commands to remove ASPLv1.00
# su - euler
# rm -rf ~/.aspl
# rm -rf /opt/euler/ASPLv1.00